Showing posts with label tutorial. Show all posts
Sunday, July 23, 2023
Speedpaint orc tutorial
Because I got a lot of questions, here a basic photo tutorial for my monopose orc recipe.
P.s. The unlabeled bottle is deathguard green.
Thursday, January 14, 2021
Tutorial: how I do paint lava bases.
Hello to everyone, I recently painted a bunch of miniatures from Massive Darkness and I found an interesting problem, they already had bases.
With some work I should be able to cut the dwarves from the bases, but I am a lazy man and I tried something different.
Painted lava bases.
I already made some lava bases in the past with cork and a similar paint scheme, but this time paint only (almost).
Here the recipe.
Step 1. Red background. To tell the truth you can also go with a yellow one. But I found a red background works better because it makes the yellow a little warmer.
Wednesday, April 4, 2018
Easy small columns: tutorial
Another quick tutorial: easy columns. This metod Can help you to make some cheap terrain, but unfortunately nothing very detailed.
In any DIY store you can find wooden caps used to repair imperfections on your wooded forniture. You drimel out the gross part and glue a wood cap. These caps can be found in several sizes. You simply need to glue these caps together.
Here an example of the product.
And with some drybrush...
As stated before, nothing spectacular, you can see the wood texture. But you can make a large amount of these colums in a very small amount of time and with even less money.
In any DIY store you can find wooden caps used to repair imperfections on your wooded forniture. You drimel out the gross part and glue a wood cap. These caps can be found in several sizes. You simply need to glue these caps together.
Here an example of the product.
And here some example.
The cilindrical piece is also found in the same bricolage stores.
As stated before, nothing spectacular, you can see the wood texture. But you can make a large amount of these colums in a very small amount of time and with even less money.
Thursday, December 28, 2017
Stalagmites: tutorial
Hello guys, I hope you had a wonderful Christmas full of love and gifts.
Well, back to business.
Looking for gifts I finally found some big cone-shaped seashells. I think they are used for fish tanks, but we'll use them for something better.
Stalagmites! (or stalactites if you glue them on the ceiling).
First of all what do you need?
In this tutorial I'll show you how to make stone, ice and lava terrain. But you can use these shells to make some organic looking terrain too, maybe an alien breeding nest, or crystal towers. If you are thinking to use one of these shell as a base for a Roper or some other creature... please let me know if you made it.
Cave stalagmites tutorial
1) make a little blob of clay on your base and put the shells in the order you like. I prefer to have the big sheels a little on the background.
2) sculpt the clay as you like, you can texturize it with a rock or tin foil. I used the back of a brush to make some holes. I also add some big rocks around.
3) flock as you like. I used two different sands to have a mix of small and medium rocks.
4) paint it. I used only drybrush from this one. In order: black primer, dark brown, sienna brown, dark gray, light gray, white.
The technique is the same if you want to make different terrain. For example:
Icicles
The difference is only in the paint, you can check my igloo tutorial to know how I painted the ice. The short version is: white coat, cyan wash, drybrush white, fake snow. Let's see how they look painted and with Santa's friends.
Also, about the igloo, here a bonus figure, the saberthoot tiger toy I showed in the tutorial.
I think it is pretty amazing.
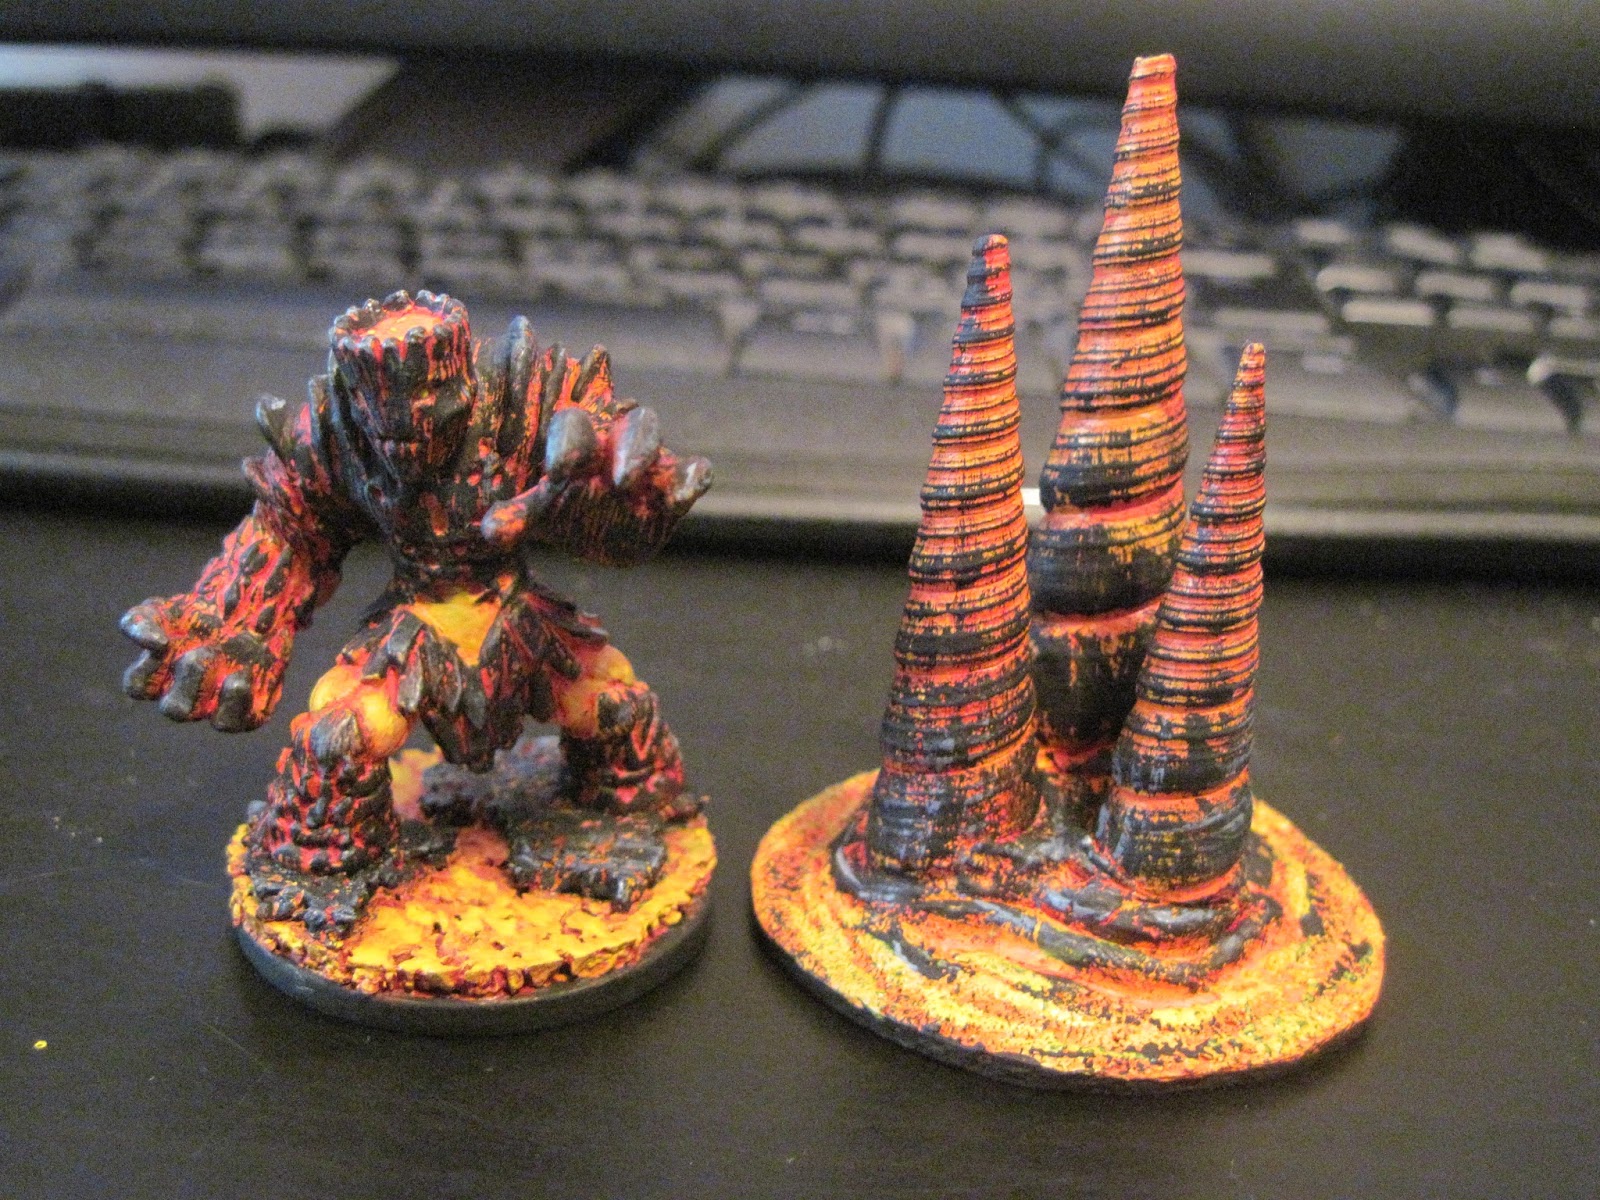
Last, lava terrain. Again, same technique. This time I used the same colors as for my fire elemental. White basecoat, yellow, red wash, drybrush yellow, drybrush black, drybrush dark gray.
And finally, a shot with everything. As stated before, you can put the shells upside down to make stalactites.
Well, back to business.
Looking for gifts I finally found some big cone-shaped seashells. I think they are used for fish tanks, but we'll use them for something better.
Stalagmites! (or stalactites if you glue them on the ceiling).
First of all what do you need?
- The cheapest air dry modelling clay you can find (if you are a gluegun master you can use it)
- cone shaped seashells
- something to use as a base (I used pressed cardboard)
- sand
- glue
- paint
In this tutorial I'll show you how to make stone, ice and lava terrain. But you can use these shells to make some organic looking terrain too, maybe an alien breeding nest, or crystal towers. If you are thinking to use one of these shell as a base for a Roper or some other creature... please let me know if you made it.
Cave stalagmites tutorial
1) make a little blob of clay on your base and put the shells in the order you like. I prefer to have the big sheels a little on the background.
2) sculpt the clay as you like, you can texturize it with a rock or tin foil. I used the back of a brush to make some holes. I also add some big rocks around.
3) flock as you like. I used two different sands to have a mix of small and medium rocks.
4) paint it. I used only drybrush from this one. In order: black primer, dark brown, sienna brown, dark gray, light gray, white.
The technique is the same if you want to make different terrain. For example:
Icicles
The difference is only in the paint, you can check my igloo tutorial to know how I painted the ice. The short version is: white coat, cyan wash, drybrush white, fake snow. Let's see how they look painted and with Santa's friends.
I think it is pretty amazing.
Last, lava terrain. Again, same technique. This time I used the same colors as for my fire elemental. White basecoat, yellow, red wash, drybrush yellow, drybrush black, drybrush dark gray.
And finally, a shot with everything. As stated before, you can put the shells upside down to make stalactites.
Subscribe to:
Posts (Atom)